
Utilizing the dual capabilities of Gleek AI Chat and Gleek Code Editing Mode, we'll walk you through the process of creating a class diagram for a university management system. Whether you're an experienced user or a newcomer to Gleek, this guide will ensure you can craft detailed, precise diagrams with ease.
What is a Class Diagram?
A class diagram is a type of static structure diagram within the Unified Modeling Language (UML) that describes the structure of a system. This diagram outlines the key entities within the system, known as classes, and the relationships between these classes.
Each class is represented by a box which contains three compartments:
The top compartment contains the name of the class.
The middle compartment lists the attributes or properties of the class.
The bottom compartment includes the methods or operations the class can execute.
Class diagrams are used in software engineering for a variety of purposes. They're primarily employed during the design phase to define the system's structure such as library management, ATM systems, restaurant management systems, and even online shopping systems. But they can also be used for detailed modeling, and even for information flow analysis and modeling.
Now that we've covered what a class diagram is, let's delve into how to create one using Gleek.
Creating a class diagram for a university management system
A University Management System, also known as a Student Information System, is a tool designed to manage all the administrative tasks of a university. It involves managing information about students, professors, staff, courses, assignments, grades, and other educational or administrative data.
Make your own UML class diagram with Gleek.
When creating a class diagram for a University Management System, several key components or classes come into play:
Student: This class would include attributes such as student ID, name, address, course enrolled, etc., and methods like registerCourse(), payFees(), attendLecture(), etc.
Professor: Attributes could be professor ID, name, subject expertise, etc., with methods like conductLecture(), evaluateAssignments(), etc.
Course: This class could have attributes like course ID, course name, credit hours, etc., and methods like addCourse(), removeCourse(), etc.
Administrator: This class might include attributes like administrator ID, name, role, etc., and methods like manageStudents(), manageCourses(), etc.
Department: Department ID, department name, department head, etc. could be the attributes, and methods could be addDepartment(), removeDepartment(), etc.
You might be also interested in: State diagram for the student registration process with the Gleek app
These classes are interconnected. For example, the 'Student' class is associated with the 'Course' class (a student enrolls in a course), and the 'Course' class is related to the 'Professor' class (a professor teaches a course).
Creating a class diagram for such a system can help in understanding the various interactions among these entities and planning the system's structure effectively. Now, let's move on to initiating a new diagram.
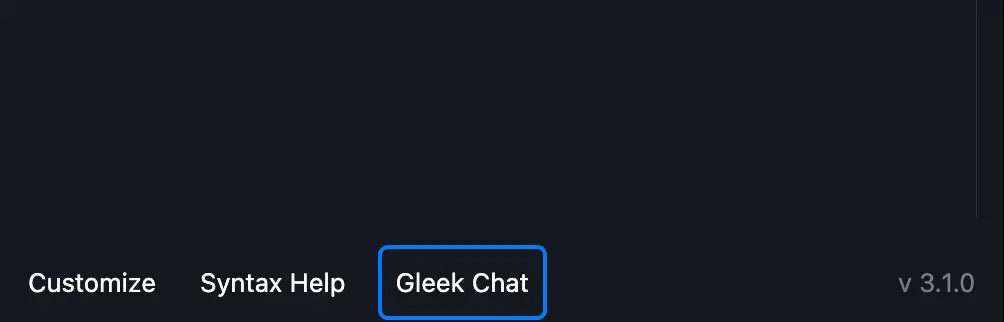
Step 1: Initiating a New Diagram
Firstly, navigate to Gleek and select "New Diagram". If you already have a premium subscription, you'll find the "Gleek chat" button located at the bottom of the code field.
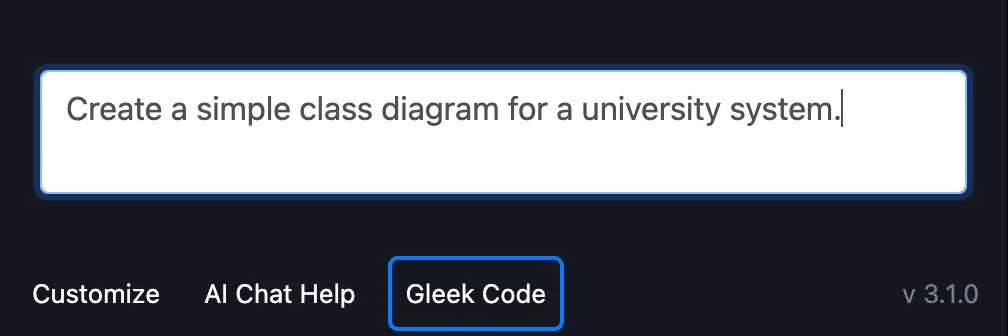
Upon clicking this button, a chat window will appear, ready for you to input your desired prompt. For our purpose, we'll use:
"Create a simple class diagram for a university system."
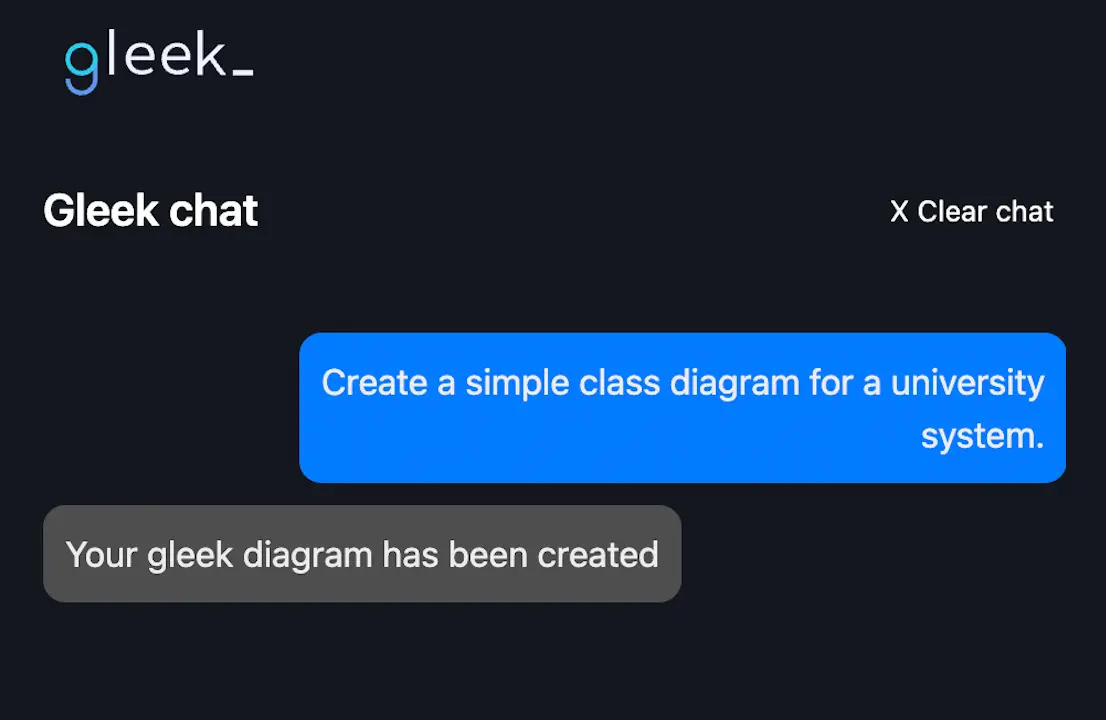
On sending this prompt, Gleek's AI chat will begin generating your requested diagram.
Occasionally, the generated result may contain minor errors that prevent the diagram from displaying correctly, such as connection errors. Gleek's flexibility allows you to quickly rectify these issues by switching to coding mode using the "Gleek code" button located at the bottom left, enabling you to adjust connections according to Gleek's syntax. Alternatively, you can request a new diagram, as each AI-generated result is unique.
Make your own UML class diagram with Gleek.
Step 2: Transition to Gleek Code
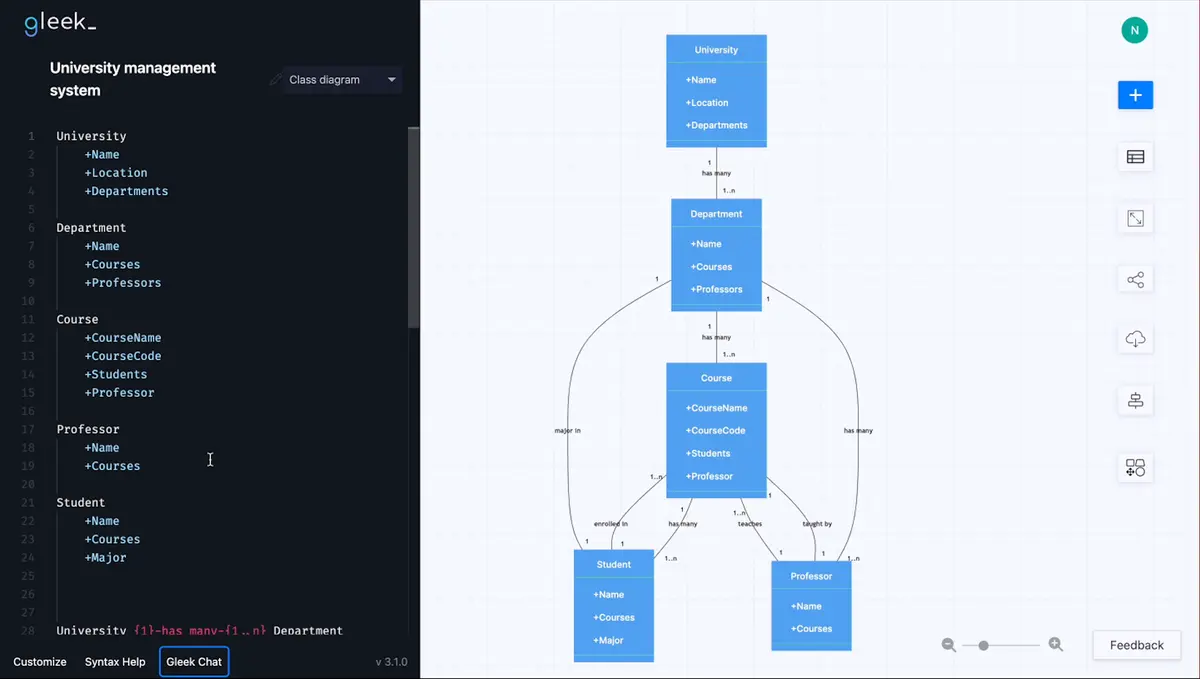
Once you have your initial diagram, it's time to shift into Gleek code editing mode and start refining. The generated class diagram will likely contain several classes, including University, Department, Course, Professor, and Student, each with a few basic attributes but lacking methods. Our aim now is to enhance each class and add any missing elements.
To learn more about Gleek's syntax check out our previous how-to article: UML Class diagram for online shopping: Step-by-step tutorial
Step 3: Enhancing Existing Classes
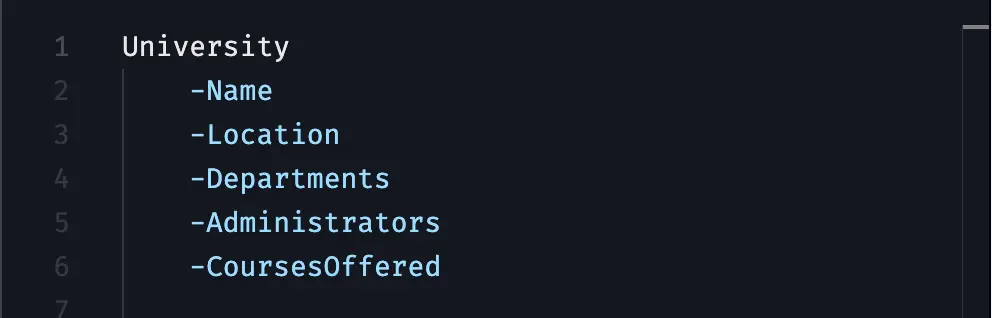
Let's begin with the "University" class, which currently has three attributes: Name, Location, and Departments. To add missing attributes, press ENTER after the last attribute and type "-Administrators", then press ENTER again and add "-CoursesOffered" on a new line.
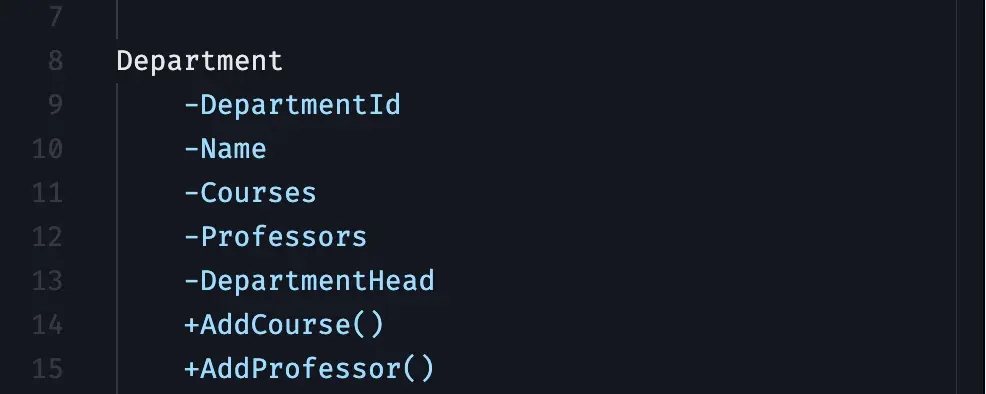
Next, we'll focus on the "Department" class. This class lacks the "-DepartmentId" attribute, which we'll insert at the beginning. We'll also add the "-DepartmentHead" attribute. Once we've enriched this class with all the necessary attributes, we can proceed to add missing methods. In Gleek, creating a method is as simple as adding "()" at the end of each line, like so:
+AddCourse()
+AddProfessor()
Step 4: Incorporating Missing Classes
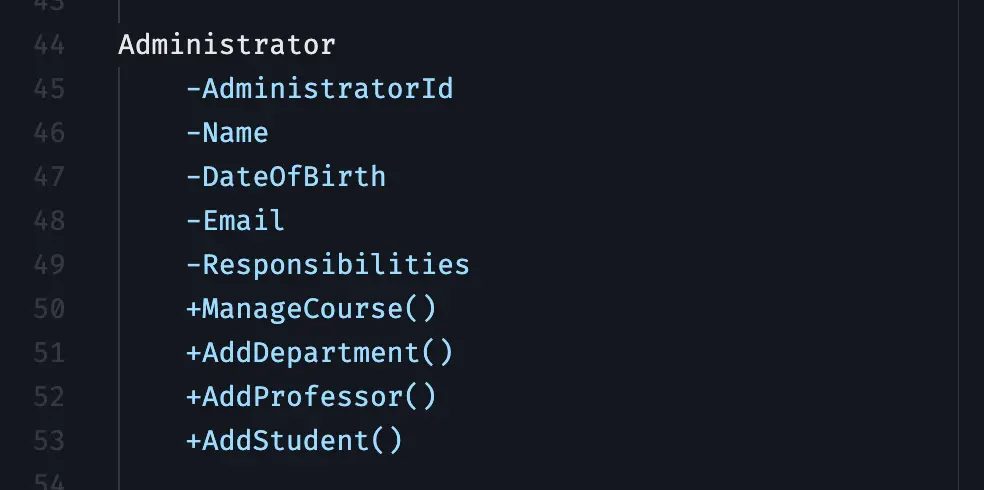
Now, let's consider if there are any classes that need to be added. For our university management system, we're missing an "Administrator" class. To add a new class, simply capitalize the class name, and it will instantaneously appear on the diagram.
Next, it's time to populate this class with attributes: ID, Name, Date of birth, email, and responsibilities. To add an attribute, move to a new line, press “Tab”, and input the attribute name.
Once you've pressed “Tab” on the initial line, you no longer need to press it for subsequent lines.
Read also: How Class Diagrams Are Evolving in Modern Software Engineering
We'll also add methods for the "Administrator" class: ManageCourse(), AddDepartment(), AddProfessor(), and AddStudent().
Make your own UML class diagram with Gleek.

Step 5: Establishing Connections
Finally, let's create a connection between the Administrator and Course classes. Scroll to the relationships at the end of the diagram code regenerated by Gleek AI chat and add the following connection:
Administrator {1}-manages-{1..n}Course

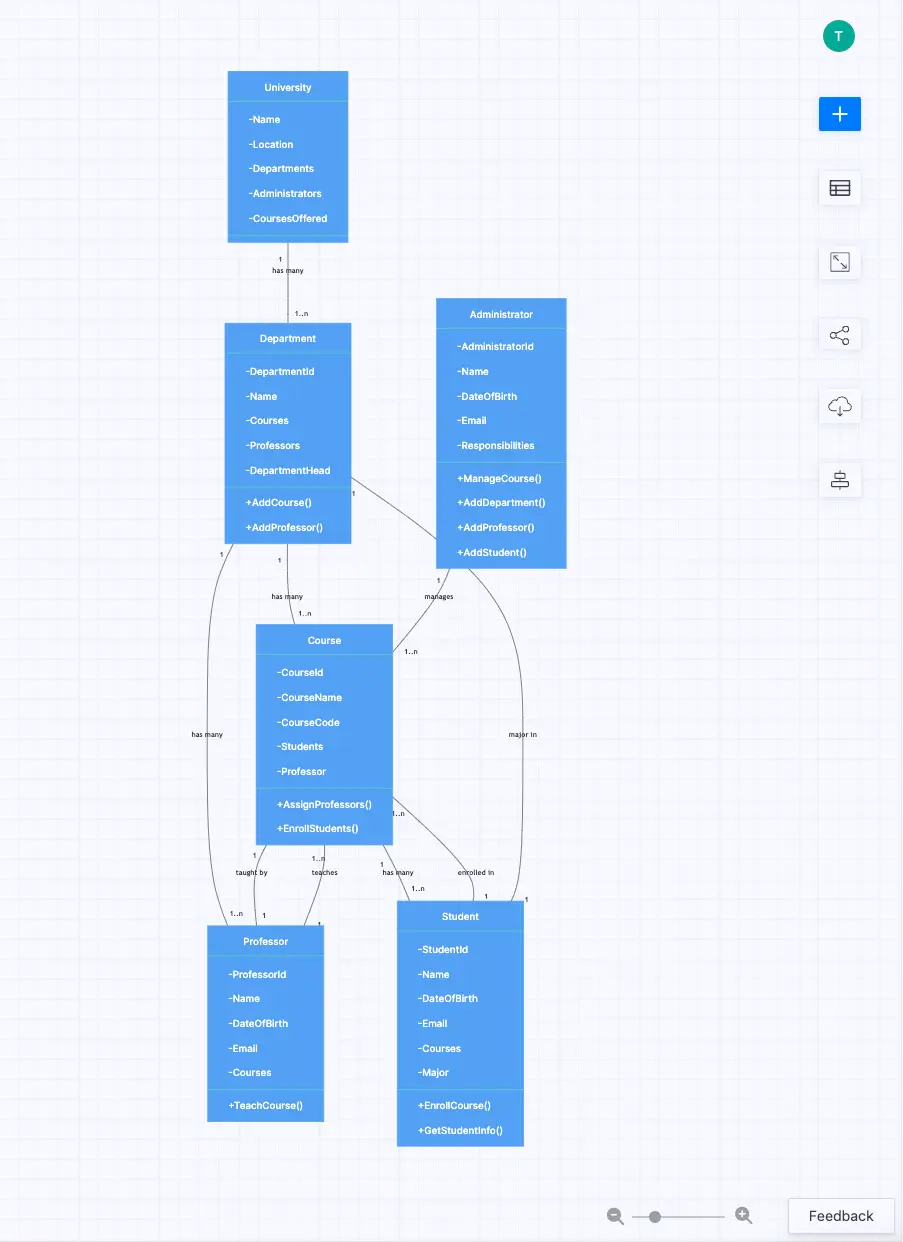
And there you have it! Your comprehensive class diagram for a university management system is complete. If you don't have access to Gleek Premium and thus the Gleek AI chat, remember that you can still create a class diagram for a university management system from scratch using the standard Gleek interface.
Related posts
Class diagram for an ATM system: a step-by-step guide
UML Dependency: Managing Relationships in Software Design
Mastering inheritance in class diagrams
UML class diagram arrow types: explanations and examples
What an association relationship is in UML?
How do we create a Class diagram for a Library Management system?
What is multiplicity in a class diagram?
UML relationships explained: Dependency, Realization, Association
Hospital management system class diagram using Gleek App