
What are entity-relationship diagrams?
An ER diagram is a way for the designer of a database to visually represent the entities, or data objects, to be created in the system. The ERD is drawn before starting work on creating the database itself, so that the designer can identify potential problems and clarify business requirements. Or they can be created for an existing system for documentation purposes.
Related article: UML vs. ER diagrams: A detailed comparison
Each entity in an ERD has attributes and relationships to other entities. The entities are represented as rectangles, with their attributes listed inside the box, and the relationships are shown as arrows or lines connecting the rectangles.
Several different types of notation systems are used for drawing ER diagrams. One of the earliest, Crow’s Foot notation, is still one of the most popular, so we’ll use that in our example ER diagram of an online shopping system. If you want to explore alternative systems, you can check out this comparison of Chen notation with Crow’s Foot notation.
What are the entities and attributes in an online shopping system?
One way of starting an ERD is to list the entities you expect to need in the diagram and list the attributes those entities should include. It’s a good idea to keep the requirements as basic as possible when doing the initial sketch. You can always add more detail and more attributes as they arise.
Check out the tutorial on Online shopping systems with a Class diagram.
We’re going to create an ER diagram for an online shopping system, so briefly explore the entities we’ll need and some of the attributes they should include.
Make your own ER diagram in Gleek.
We can start with the customer. It’s the customer who will be the active agent in this system, so that makes sense. At a minimum, our customer needs a unique customer ID number, a name, and an email address.
Related post: ER diagram for a hospital management system using Crow’s Foot notation
Next up is the customer’s shopping cart. This will need to store products and quantities. That leads us to the product and product category entities.
Going back to the customer, once an order is placed, our system will generate an order entity and the customer will pay for the order, an action that will require a payment entity. Our online store also includes the option to apply discount codes to orders before payment, so that means we need a discount code entity.
These entities will come to life in the ER diagram once we connect them with relationships, so let’s open up the Gleek app and start drawing!
How do you draw an ER diagram for an online shopping system?
So we’ll now first create our customer entity. Just type the word Customer, hit Enter, and then hit the Tab key to indent the attributes for the entity. We’ll add customer ID, name, and email address. Two of these are strings, while one, customer_id is an integer. To add either, just type string or int and then a space before typing the attribute name.
Here’s our first entity in Gleek.
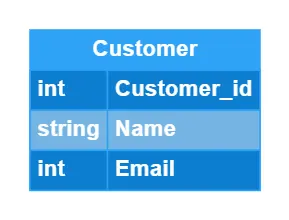
You can see that Gleek has automatically formatted the entity to be readable and tidy, with the attributes neatly displayed. All that from just a few lines of code 😊
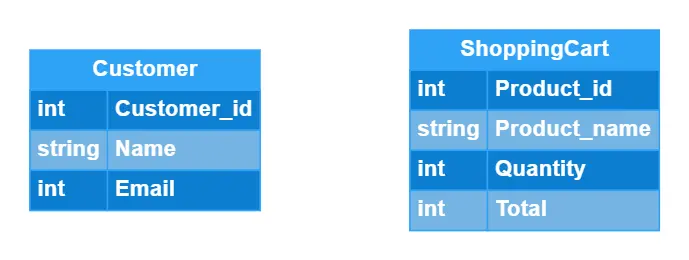
Next up is the customer’s shopping cart. This time we’ll add product ID, name, quantity, and total.
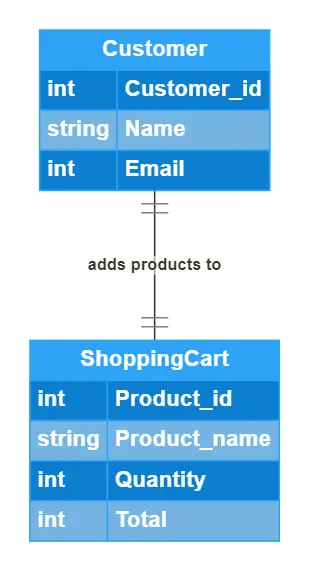
We can also now introduce our first relationship. The customer adds products to the shopping cart. This relationship includes the concept of cardinality, in that the customer can add one and only product to the cart at a time and each cart can be associated with one and only one customer.
We create this relationship with the following code in Gleek. The curly brackets tell Gleek how to format the Crow’s Foot notation lines connecting the entities.
Customer {1}-adds products to-{1}ShoppingCart
Tip: you can always get help on Gleek syntax by clicking the Syntax Help link at the bottom of the code field.
And here’s how it looks in Gleek.
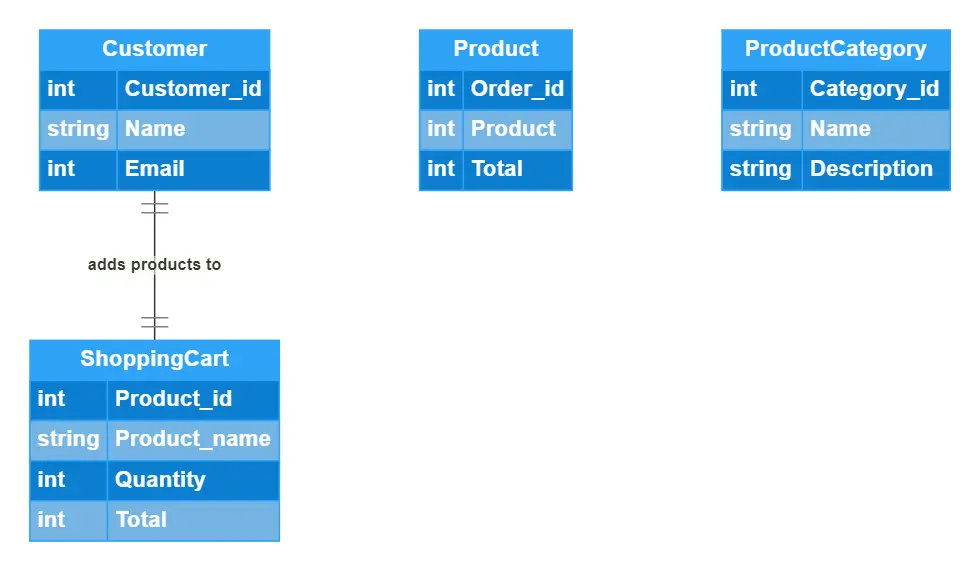
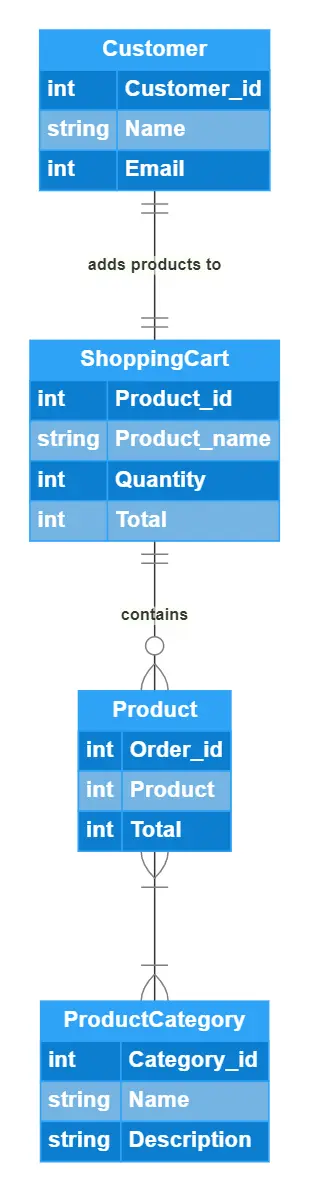
We’ll need products for the customer to select, so we’ll add the product and product category entities. The product entity needs to be associated with an order ID and also needs a product number and total. The product category needs a category ID, name, and description.
Now we can connect our two new entities. The following code tells us that the shopping cart contains products and the products can be found in categories.
Product{1..n}–{1..n}ProductCategory
ShoppingCart {1}-contains-{0..n}Product
Note that a product can be associated with one and only one shopping cart, while a shopping cart can have zero or many products. That’s because the shopping cart will start out empty and it’s always possible for the customer to remove all products at any time. The relationship between product and product category is one or many in both directions.
The relationships will look like this in Gleek.
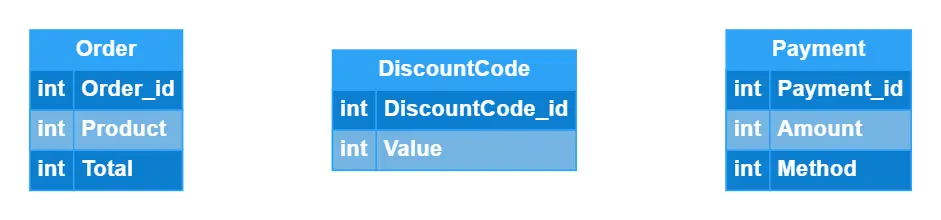
We’re nearing the end of our ER diagram now, but we still need to create the last three entities and connect them up. So let’s add order, payment, and discount code.
Make your own ER diagram in Gleek.
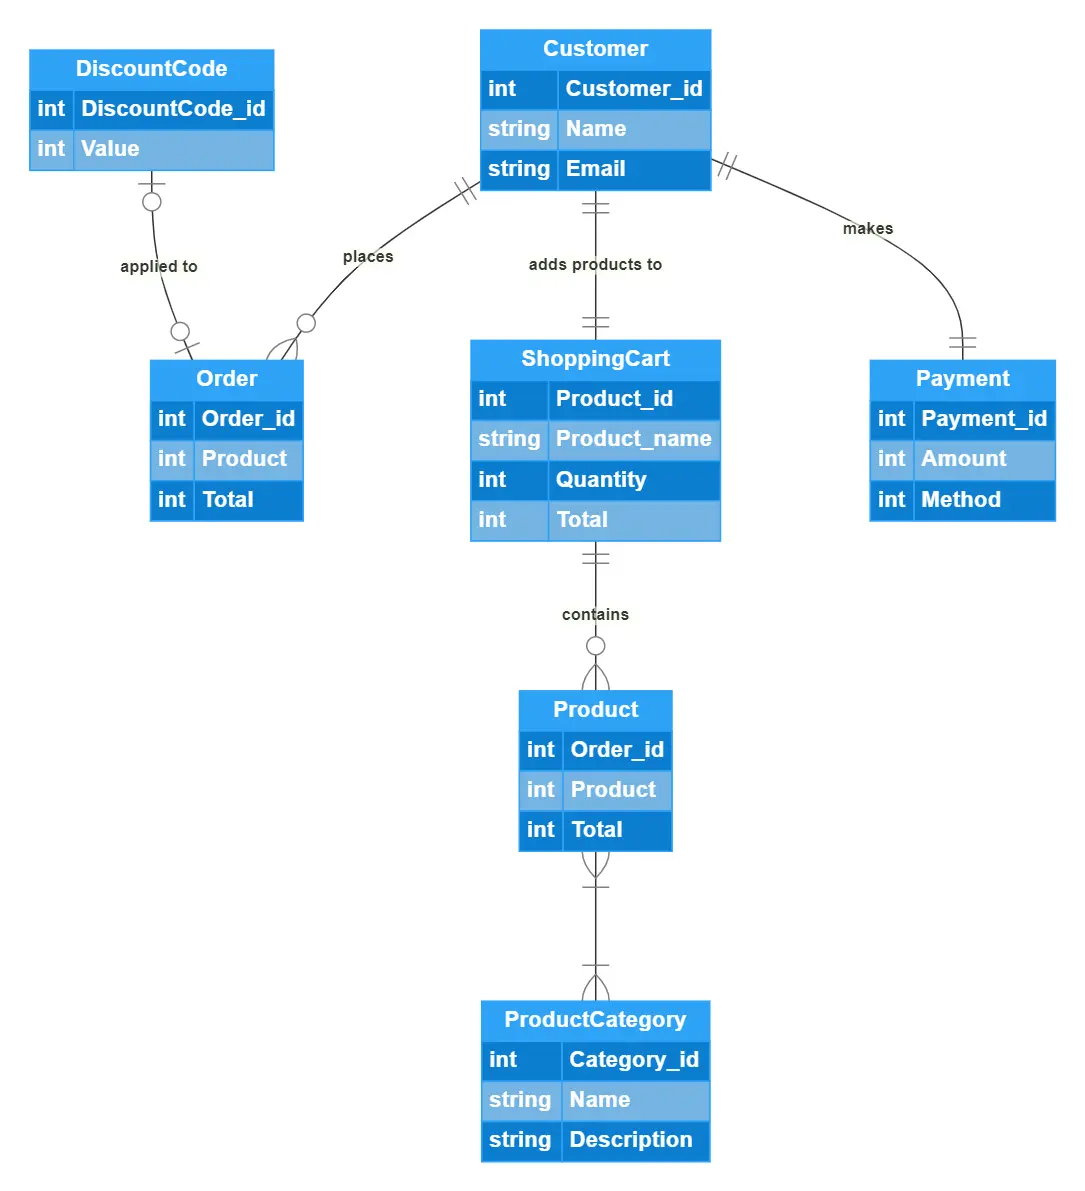
Order needs an ID, product, and the total count of that product. Payment needs an ID, an amount, and the method used, e.g. cash, credit, or transfer. Discount code should include its unique ID and the value to be subtracted from the order total.
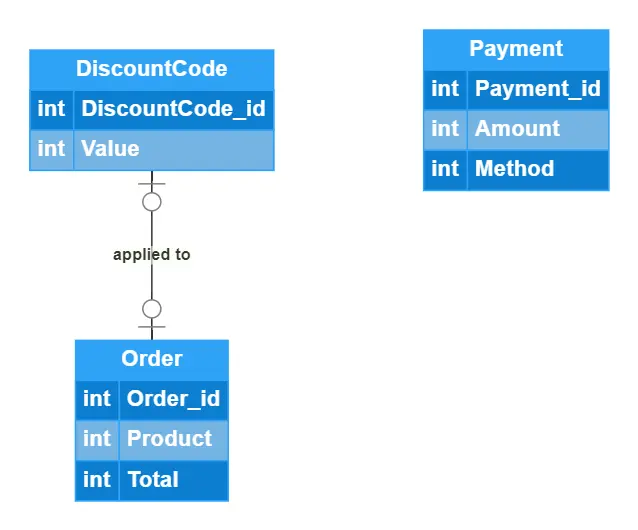
Discount code is the easiest to connect. It applies a discount to order, so it has a one or zero relationship in both directions, because some unlucky customers won’t have any discount codes ☹
DiscountCode {01}-applied to-{01} Order
Order has a direct relationship with customer. It’s a zero to many relationship from the customer to the order, as a customer might not have any active orders or could have multiple simultaneous orders.
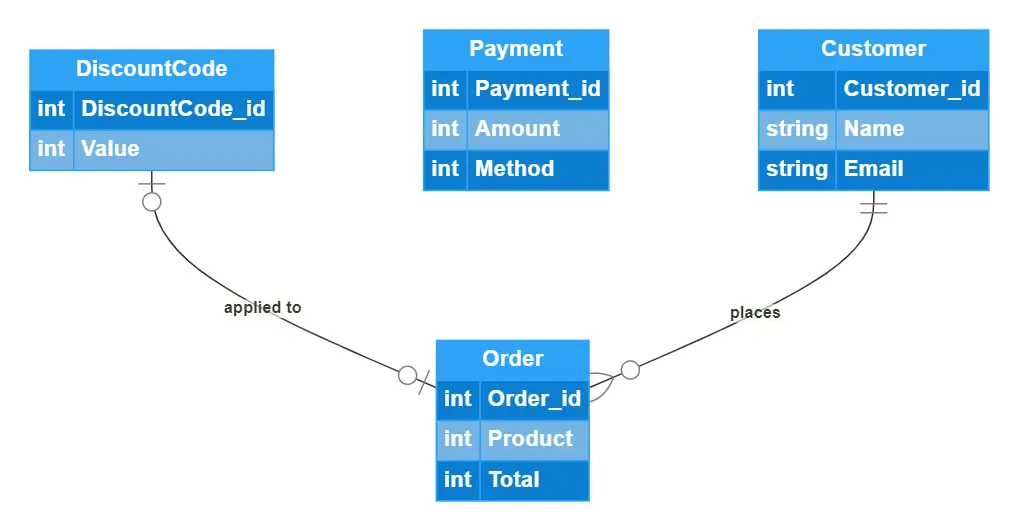
The final relationship is between customer and payment and it’s a very simple one and only one relationship. Each customer is directly associated with each payment.
And that completes our online shopping entity-relationship diagram. Here’s the finished result.
You can probably already imagine ways that you can expand on this diagram by including other entities that can interact with the system or by including more attributes. ER diagrams are a great way to sketch out your design before starting to code anything. And with Gleek, you don’t even need to touch a mouse or worry about aligning shapes and arrows. Try it yourself by editing the template ER diagram for our online shopping system. You can also check out our guide on how to create an E-commerce website ER diagram but this time with the help of Gleek's newest feature: AI chat that creates a diagram from the prompt.
Related posts:
ER diagram for a hospital management system (Crow’s Foot notation)
All about ER model cardinality with examples
ER diagram for an E-commerce website with Gleek's AI chat
Relational schema vs. ER diagrams: A detailed comparison
What is the entity-relationship diagram in database design?
Crow’s foot notation in entity-relationship diagrams
UML vs. ER diagrams: A detailed comparison
Crow’s Foot vs. Chen notation: detailed comparison for 2021
How do you convert an ER diagram into a relational schema?
Enhanced entity-relationship diagram: features and components
11 Best ER diagram tools to use in 2022
Composite and other attributes in the entity-relationship model