
Understanding the relationship between different aspects of an e-commerce website can be difficult without a visual aid. That's where Gleek, an AI-powered diagramming tool, comes in handy. In this article, we will guide you through the process of creating an Entity-Relationship (ER) diagram for an e-commerce website using Gleek.
What is an ER Diagram?
An Entity-Relationship (ER) Diagram is a type of structural diagram that visually represents the system's entities, their attributes, and the relationships between them. It's a crucial component in database design and software engineering, helping to define how data interacts within a system.
Make your own ER diagram in Gleek.
There are three primary components in an ER Diagram:
Entities: These are objects or concepts that hold significance for the system. For an e-commerce website, entities could include User, Order, Product, and Payment.
Attributes: These are the properties or characteristics of an entity. Attributes can be simple, composite containing several simple attributes, or derived from other attributes. Attributes are further classified into three types: string (textual information), int (integer values), and Unique Identifier (a unique value that distinguishes each record). For example, a User entity might have attributes like UserID (Unique Identifier), UserName (string), and UserAge (int).
Relationships: These define how entities interact with each other. For instance, a User places an Order, an Order contains a Product, and an Order has a Payment. There are one-to-one, one-to-many and many-to-many relationships.
Learn more about ER diagram notation and components.
Key Components of E-commerce Website Processes
When creating an ER diagram for an e-commerce website, we need to focus on the main components that make up the processes within the website. These could include:
User Management: This involves tracking user details and managing user accounts.
Product Catalog: This includes managing product listings, product categories, and inventory.
Order System: This involves tracking orders, order status, and payment details.
Payment System: This includes managing payment methods, transactions, and payment statuses.
Shipping and Delivery: This involves managing shipping addresses, shipping methods, and delivery status.
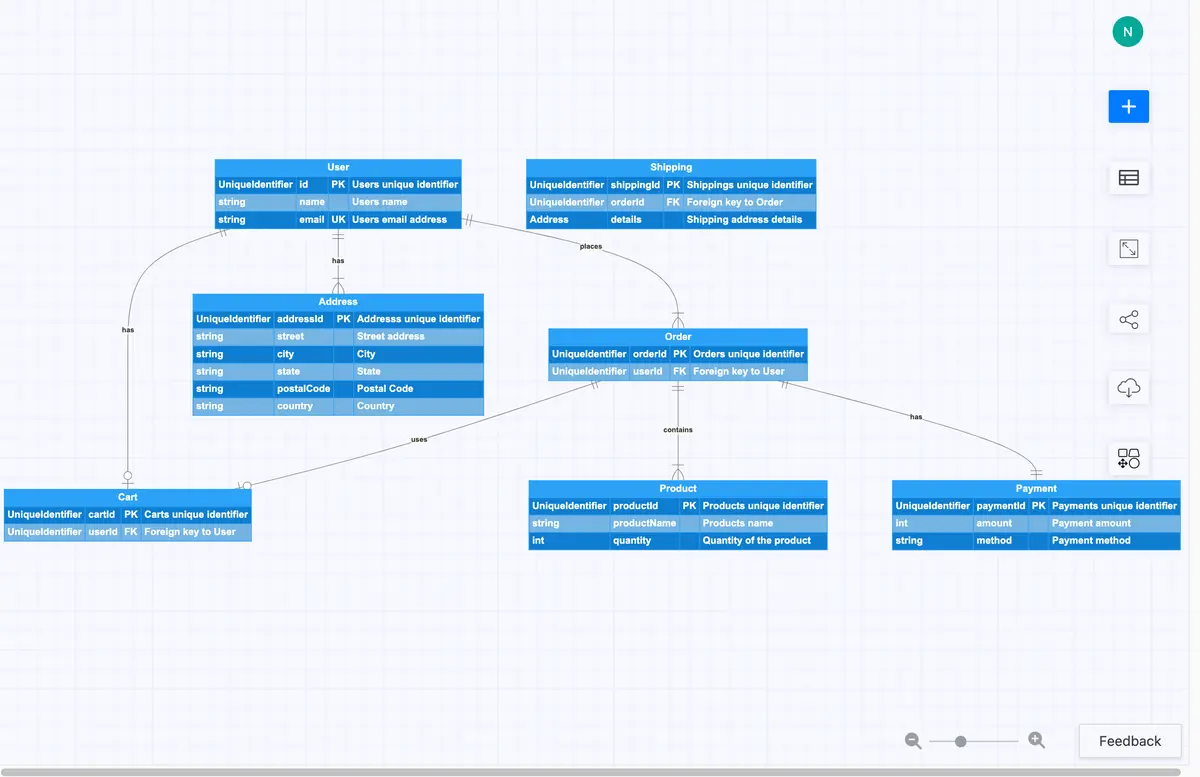
Entities for E-commerce ER Diagram
Now that we have an understanding of the key components, let's look at the entities we need to include in our ER diagram:
User
Product
Category
Order
Payment
Shipping Address
Each of these entities will have their own attributes and relationships with other entities, which we will define using Gleek's easy-to-use syntax.
Step 1: Access Gleek
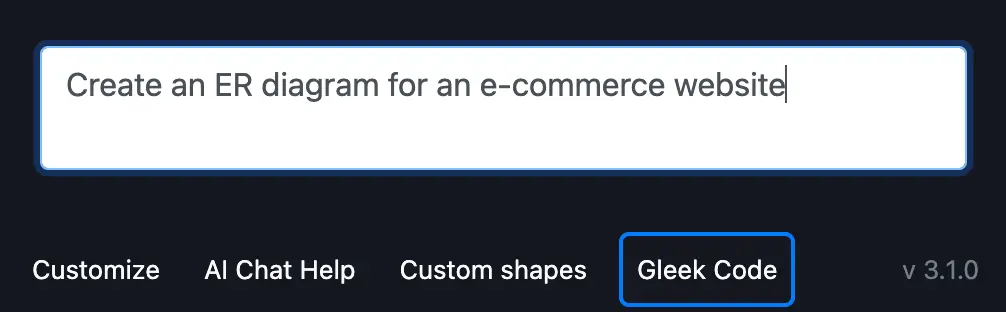
To begin, navigate to Gleek and click on "New Diagram". If you have a premium subscription, you'll find a "Gleek chat" button at the bottom of the code field.

Clicking this button opens a chat window, where you can enter a relevant prompt to generate a diagram. You can then enter a prompt such as:
Create an ER diagram for an e-commerce website.
Upon sending the request, Gleek's AI chat begins generating your requested diagram.
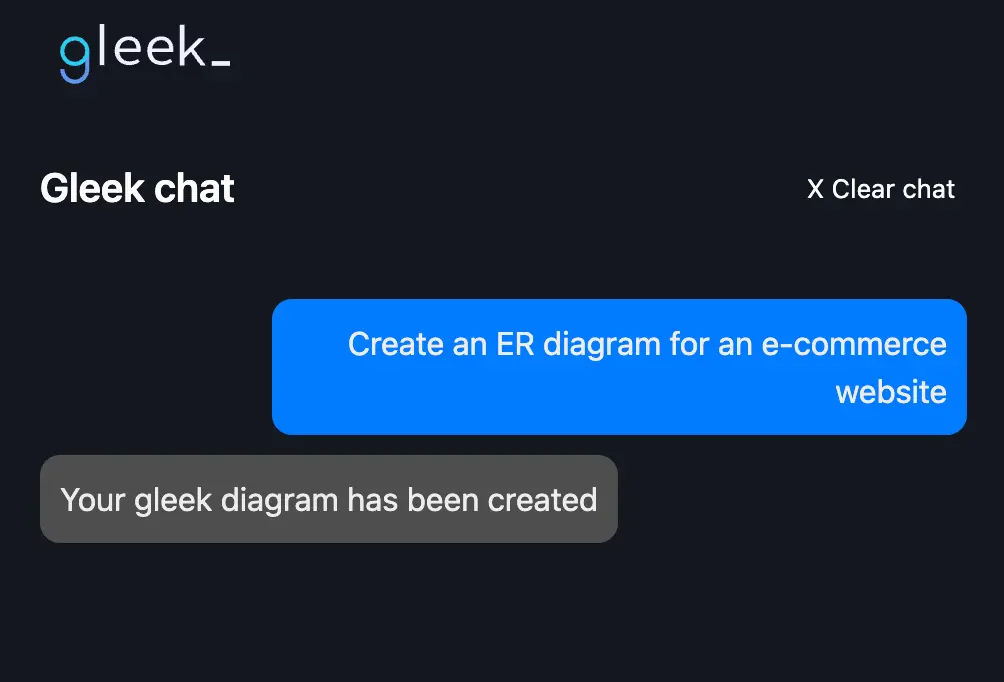
Although the result may contain errors that prevent the diagram from correctly displaying, such as connection errors, you can easily remedy these issues. Simply click on the "Gleek code" button at the bottom left to switch to coding mode and fix these connections using Gleek's syntax. Alternatively, you can request the desired diagram again, as each AI-generated result is unique.
Make your own ER diagram in Gleek.
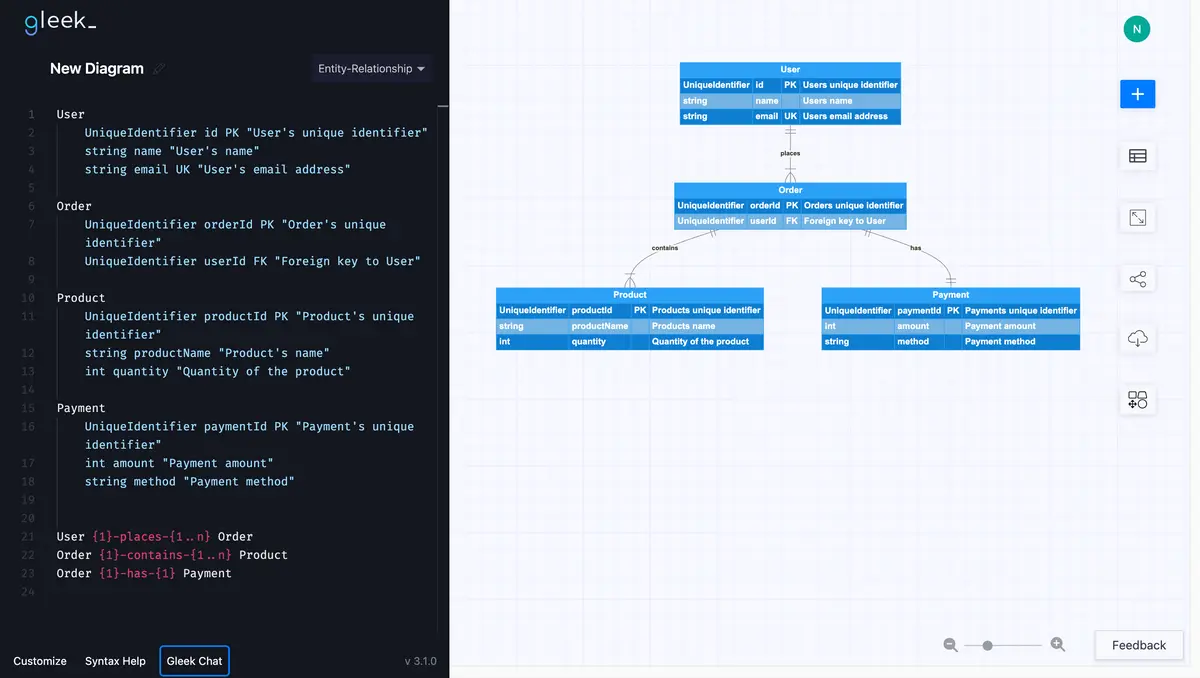
Step 2: Review and Edit the Generated Diagram
Once you receive the desired result, switch to Gleek code mode and start editing the generated diagram. The initial ER diagram for your e-commerce website might include entities like User, Order, Product, and Payment with relationships such as:
User places Order (1 to N): Each user can place multiple orders.
Order contains Product (1 to N): Each order can contain multiple products.
Order has Payment (1 to 1): Each order is associated with exactly one payment.
Step 3: Enhance the ER Diagram
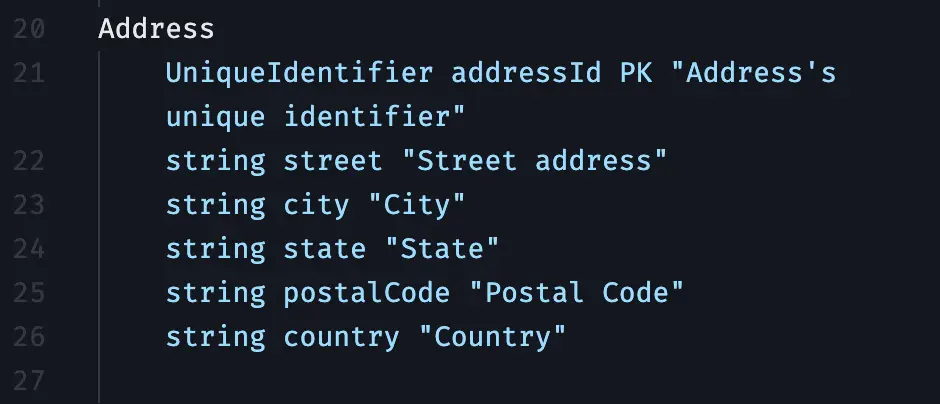
To make this ER diagram more comprehensive, let's add more entities. We'll start by adding an Address entity. Here's how you do it:
Type the word “Address” in a new line and hit the Enter key. Gleek will draw a rectangle for your entity. To add attributes, hit the Tab key to indent the next line.
The attributes should be added in the following order: type (int, string or UniqueIdentifier), name, attribute key (PK, FK, or UK), and description).
Each part should be divided by simply pressing Space. The description should be added inside of quotation marks.
Address
UniqueIdentifier addressId PK "Address's unique identifier"
string street "Street address"
string city "City"
string state "State"
string postalCode "Postal Code"
string country "Country"
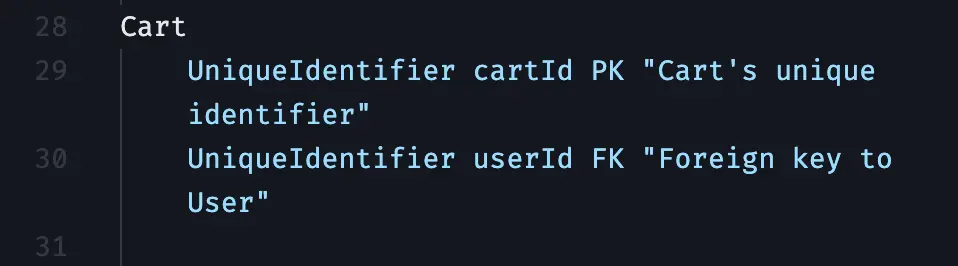
Next, add a Cart entity using the same method:
Cart
UniqueIdentifier cartId PK "Cart's unique identifier"
UniqueIdentifier userId FK "Foreign key to User"
Finally, create a Shipping entity:
Shipping
UniqueIdentifier shippingId PK "Shipping's unique identifier"
UniqueIdentifier orderId FK "Foreign key to Order"
Address details "Shipping address details"

Step 4: Define Relationships Between Entities
After adding these entities, we'll define the relationships between them. In Gleek syntax, each relationship will look like this:
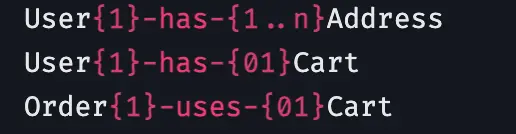
User has Address (1 to N): This allows users to store multiple addresses for shipping or billing purposes. The relationship in Gleek syntax will be "User {1}-has-{1..n} Address".
User has Cart (1 to 0 or 1): This represents the association between a user and their active shopping cart. The relationship in Gleek syntax will be "User {1}-has-{0..1} Cart".
Order uses Cart (1 to 0 or 1): This relationship indicates that an order is created based on the contents of a user's shopping cart. The relationship in Gleek syntax will be "Order {1}-uses-{0..1} Cart".
Step 5: Customize As Needed
The beauty of Gleek is its flexibility. Depending on how detailed you want your ER diagram to be, you can add even more entities such as Review, Wishlist and WishlistItem, and Category.
If you want to try other ER diagram examples, check out the tutorial on the Hospital management system.
Remember, if you encounter any errors while generating your diagram, Gleek offers robust error assistance. Whether it's a syntax error resolution, annotation issues, or formatting problems, Gleek has you covered.
Make your own ER diagram in Gleek.
With these steps, you can harness the power of AI with Gleek to create comprehensive, precise, and functional ER diagrams for e-commerce websites. Happy diagramming!
Ready, set, go
In conclusion, when creating an ER diagram for e-commerce websites, it is important to focus on the key components of the website such as user management, product catalog, order system, payment system, and shipping and delivery.
By utilizing Gleek's AI chat and syntax, you can easily generate a comprehensive diagram that includes all necessary entities and their relationships. Additionally, with customizable options and error assistance, creating an ER diagram with Gleek is a seamless and efficient process.
So why wait? Head over to Gleek now and start creating your own e-commerce ER diagram!
Related posts
ER diagram example: online shopping system (Crow’s Foot notation)
Guide to entity-relationship diagram notations & symbols
Composite and other attributes in the entity-relationship model
Crow’s foot notation in entity-relationship diagrams
Crow’s Foot vs. Chen notation: detailed comparison for 2022
Enhanced entity-relationship diagram: features and components
Relational schema vs. ER diagrams: A detailed comparison
ER diagram for a hospital management system (Crow’s Foot notation)