
In the digital world, the user experience is paramount. It can make or break an app's success. If you're in the process of developing a food ordering app, understanding your user's journey can be a vital tool for creating a successful and enjoyable user experience. This article will guide you through the process of creating a user journey diagram - a visual representation of a user's interaction with your app, from initial contact through engagement and towards a long-term relationship.
Understanding the User Journey Diagram
A User Journey diagram is a powerful tool used by UX designers and product managers to visualize the path that a user follows while interacting with a product or service. It maps out the different stages a user goes through, their goals, pain points, and the overall flow of interaction. A well-structured user journey diagram can reveal opportunities for improvement, potential barriers that might hinder user experience, and areas where users might drop off.
The components of a user journey diagram typically include stages, actions, thoughts, and emotions. Stages are the main steps a user takes when interacting with your app. Actions are what the user does at each stage. Thoughts and emotions provide insight into the user's mindset and feelings at each stage.
Make your own User Journey diagram.
User journey diagrams are used for various purposes, such as identifying gaps in the user experience, understanding user behavior, and designing more user-friendly interfaces. They are used by UX designers, product managers, developers, and even stakeholders who need to understand the user's perspective better. By creating a user journey diagram for your food ordering app, you'll be able to design a more intuitive and seamless experience for your users, eventually leading to increased user satisfaction and loyalty.
The components needed for the food delivery app diagram
Creating a user journey diagram for a food delivery app requires several key components. Each component serves a specific purpose and contributes to the overall understanding of the user's journey through the app. Here's what you'll need:
Phases: Phases represent the different stages a user goes through while interacting with the app. For a food delivery app, these might include the Discovery Phase, Selection Phase, and Checkout Phase. These phases help us understand the user's mindset and actions at each stage of their journey.
Tasks: Tasks are the specific actions users take within each phase. For instance, "Understanding App", "Explore Menu", "Choose Items", "Review Cart", and "Place Order" are tasks that a user might perform. These tasks give us a clear picture of what users do at each phase of their journey.
Emotional Context: In Gleek, you can add an emotional context to each task using numbers from 0 to 6. This helps depict how users might feel while performing a particular task, providing valuable insight into their experience and potential pain points.
Touchpoints: Touchpoints are the points of interaction between the user and the app. Examples could be "App description", "FAQs", "Categories", "Item Details", "Add to Cart", "Menu Navigation", "Cart Summary", "Edit Items", "Payment", and "Confirmation". These touchpoints show where and how users interact with the app.
Links: Links connect the tasks to their relevant touchpoints. They help visualize the flow of interactions and how different elements of the app are connected.
By combining these components, you can create a comprehensive user journey diagram that vividly illustrates how users interact with your food delivery app, from discovery to checkout. This can provide invaluable insights for improving user experience and app functionality.
User journey diagram for a food ordering app using Gleek
Step 1: Launch Gleek
Open your web browser and navigate to app.gleek.io. Make sure you're logged in to your account.
Step 2: Create a New Diagram
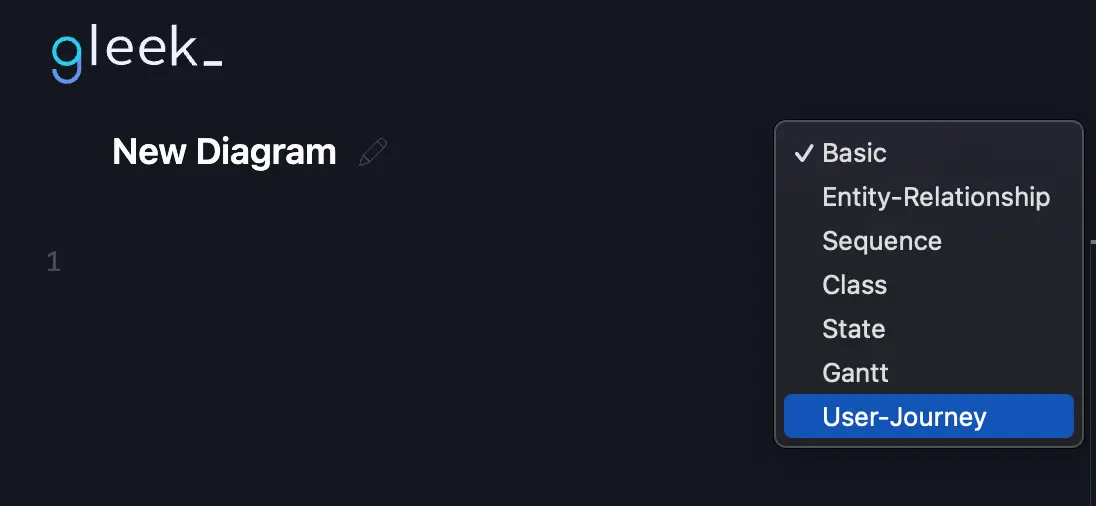
Click on the "New Diagram" button and select 'user-journey' from the dropdown menu. This will set up the canvas for your user journey diagram.
Step 3: Start with the Discovery Phase
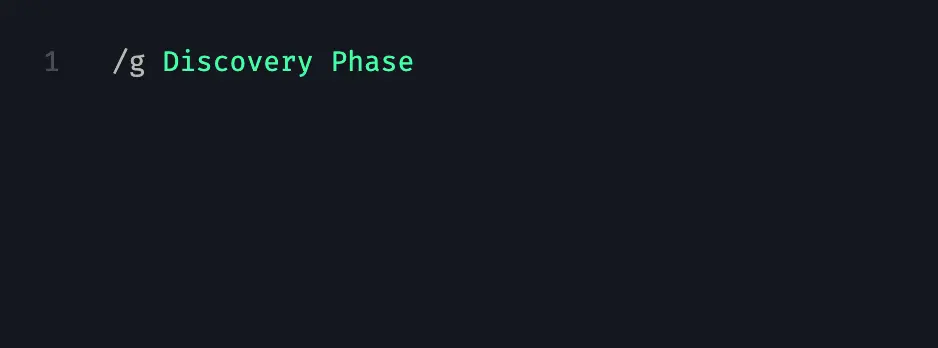
To create this section, type '/' followed by 'g', then input 'Discovery Phase'. This phase represents when users first become aware of your app and explore its features. During the Discovery Phase, users acquaint themselves with the app and its offerings. They start by exploring the app's description, understanding its features, and finding answers to their queries through the Frequently Asked Questions (FAQs) section.
Step 4: Add a Task
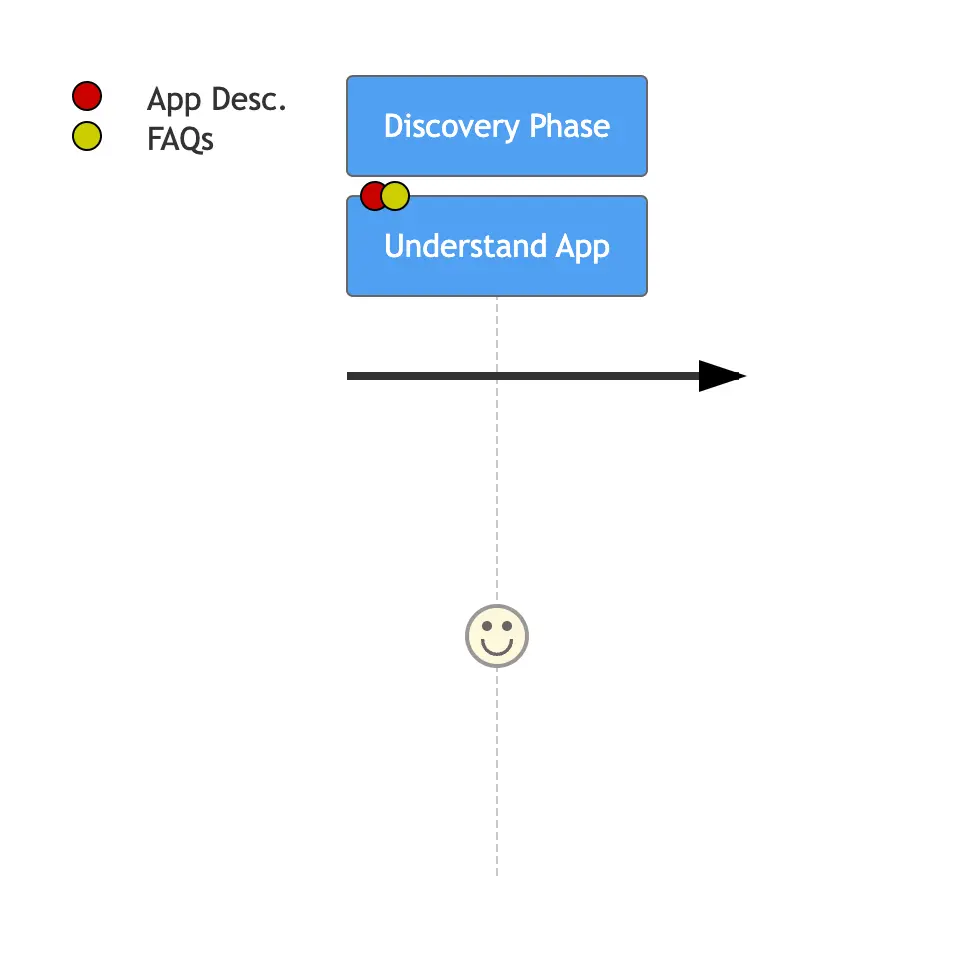
Here, add the task "Understanding App" followed by ':4' to denote an emotional context. In Gleek, 0 to 2 signify negative emotions, 3 is neutral, and 4 to 6 indicate positive emotions.
Make your own User Journey diagram.

Step 5: Link Touchpoints to the Task
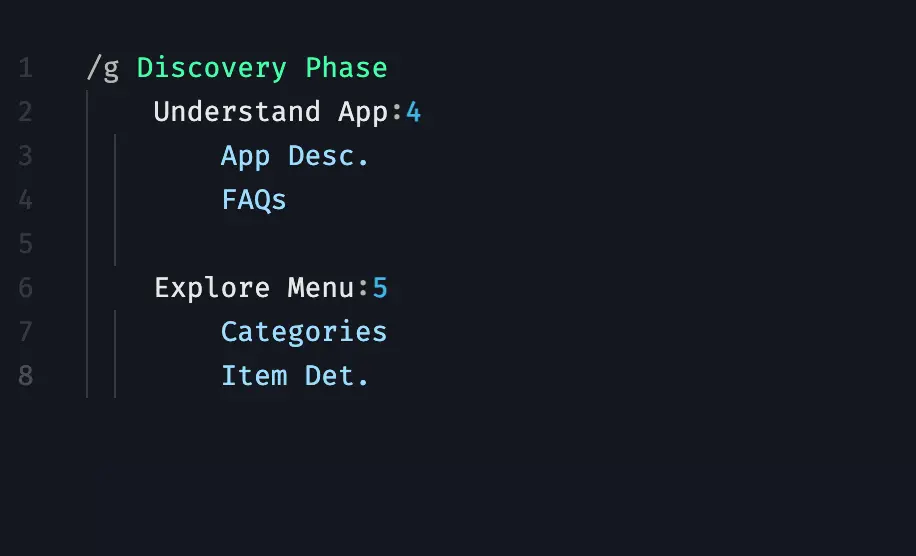
On a new line, hit TAB, then enter the touchpoints: 'App description' and 'FAQs'. Keep the names short and precise.

Step 6: Explore Menu
Next, add the task "Explore Menu", followed by ':5'. The associated touchpoints are 'Categories' and "Item Details". Users explore the menu options, navigating through various food categories and examining detailed information about specific food items or dishes.
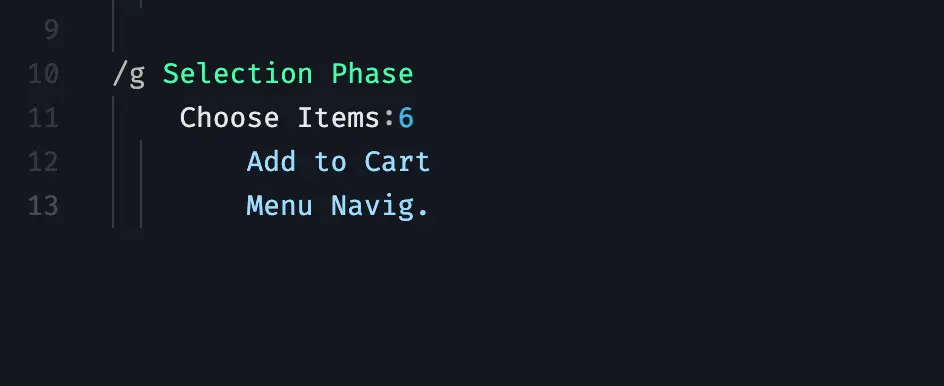
Step 7: Move to the Selection Phase
This phase is where users start adding items to their cart. Add the task 'Choose Items' and ':6', linking it to touchpoints "Add to Cart" and "Menu Navigation". During the Selection Phase, users begin to select items for their order. They add desired food items to their cart while navigating through the menu for additional choices.

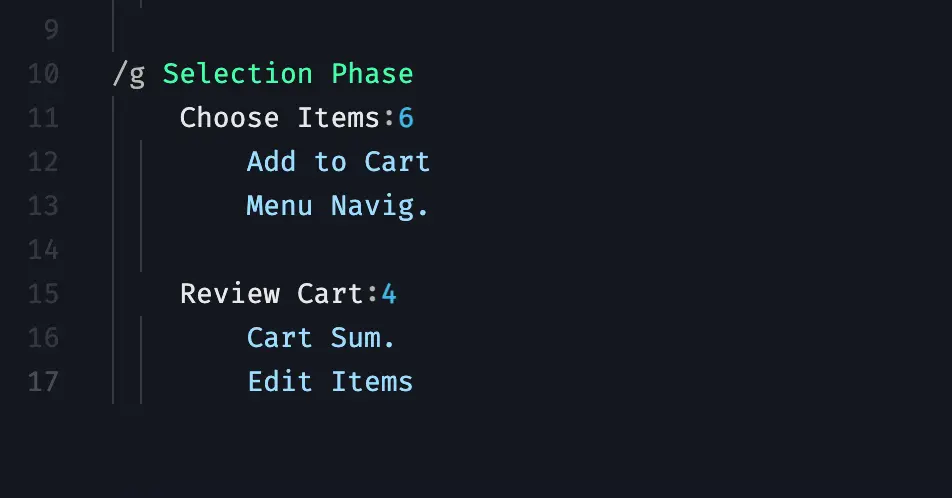
Step 8: Review Cart
Add the next task 'Review Cart' with ':4', linked to touchpoints 'Cart Summary' and 'Edit Items'. Once the items are selected, users review the contents of their cart, ensuring accuracy and making any necessary adjustments to the items in their order.
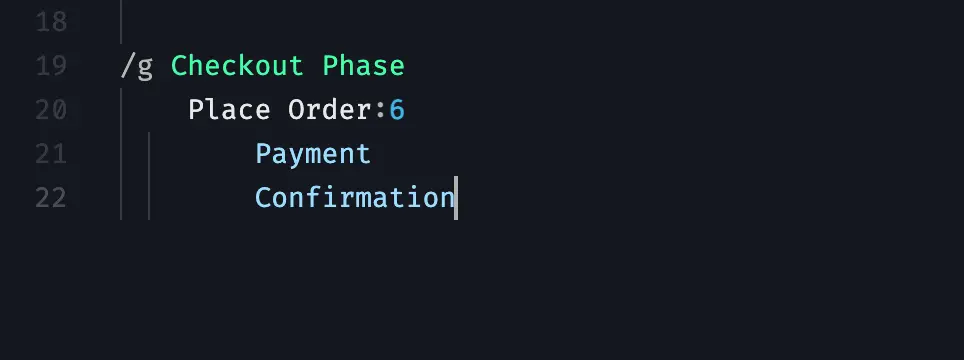
Step 9: Checkout Phase
This is the final phase, where users finalize their order. Add the task 'Place Order' with ':6', and link it to touchpoints 'Payment' and 'Confirmation'. In the Checkout Phase, users proceed to complete the purchase. They provide payment details to finalize the transaction and receive confirmation of their order placement.
Make your own User Journey diagram.
And here you have it: Review your food delivery app diagram
Checking out your food delivery app diagram is like wrapping up your user journey picture!
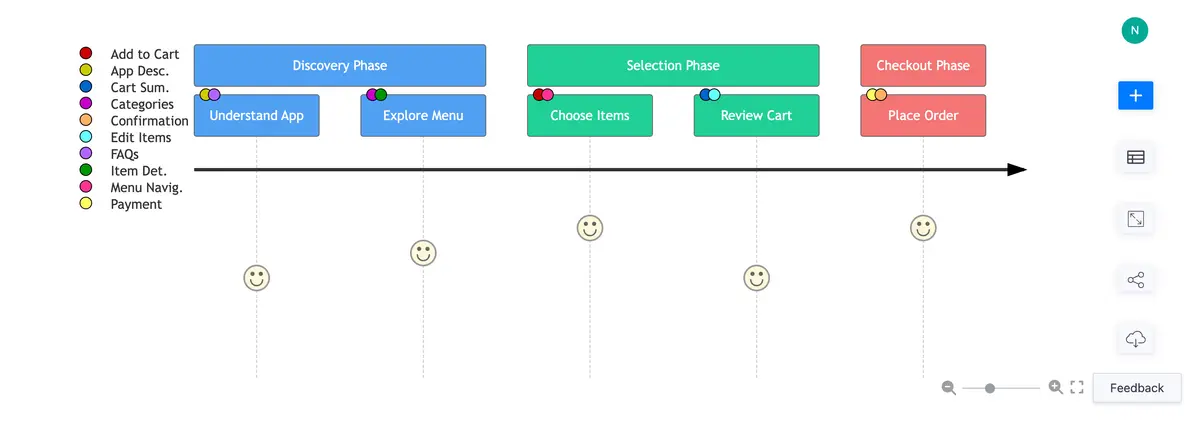
It shows the whole deal of ordering food, from finding the app to browsing the menu, picking stuff, looking over the cart, and hitting that "buy" button. This map traces how users smoothly move from discovering the app to finishing their order, making sure they have an easy time ordering food.
And hey, besides nailing User Journey diagrams like this one, Gleek rocks at other diagram types too, like Gantt charts and State diagrams. This tool's got loads of tricks up its sleeve, helping you create cool diagrams for different stuff you're working on. So, dive into Gleek's bag of features and make your diagrams pop with clarity and ease!
Related posts
Exploring User journey mapping in Design thinking: A beginner's guide
Understanding various user paths: Examples of User journey maps