
What is a sequence diagram?
Sequence diagrams are a type of Universal Modeling Language (UML) diagram. They’re used to show how objects in a system work together over time. A sequence diagram helps the designer of a system visualize and understand the order in which these interactions occur. This can make it easier to identify potential problems and optimize how everything works.
Let’s quickly summarize the basic elements in a sequence diagram.
The sequence diagram moves from top to bottom to show the sequence of events in the system. The objects included are shown at the top and bottom of the diagram as labeled rectangles with a lifeline descending the full length of the diagram. The interactions between objects are shown as horizontal arrows that go left or right. These represent messages passing between the objects.
Make your own UML sequence diagram with Gleek.
When a message hits an object’s lifeline, that object can be activated. A vertical box called an activation bar is placed on the lifeline to indicate that the object is processing the message or carrying out a command. The length of the box tells you the duration of activity.
Those are the basics about sequence diagrams and should be enough for you to understand our example sequence diagram. If you want to read about more complex elements in sequence diagrams, check out this more detailed blog post: Sequence diagram with fragments: Loop, alternative, option or watch this video of a cashier example sequence diagram.
So now that you know something about how sequence diagrams are put together, let’s move on to creating an example sequence diagram in the easy-to-use Gleek diagramming tool.
How to create a sequence diagram for a library management system
We’re going to use Gleek to create a sequence diagram that will describe how a library management system operates. If you want to follow the steps in the guide, fire up the Gleek app and make sure you have an account. Gleek will let you rapidly create great diagrams using just the keyboard, thanks to its unique diagramming syntax.
First, let’s work out the objects that we want to represent in our diagram. We’re designing a library management system, so we’ll need at least four basic elements: Member, Librarian, Book, and Transaction. With Gleek, we don’t need to set these up separately when creating a sequence diagram. We can just start describing the interactions and Gleek will automatically create the objects needed.
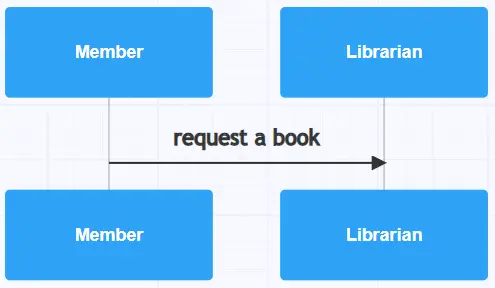
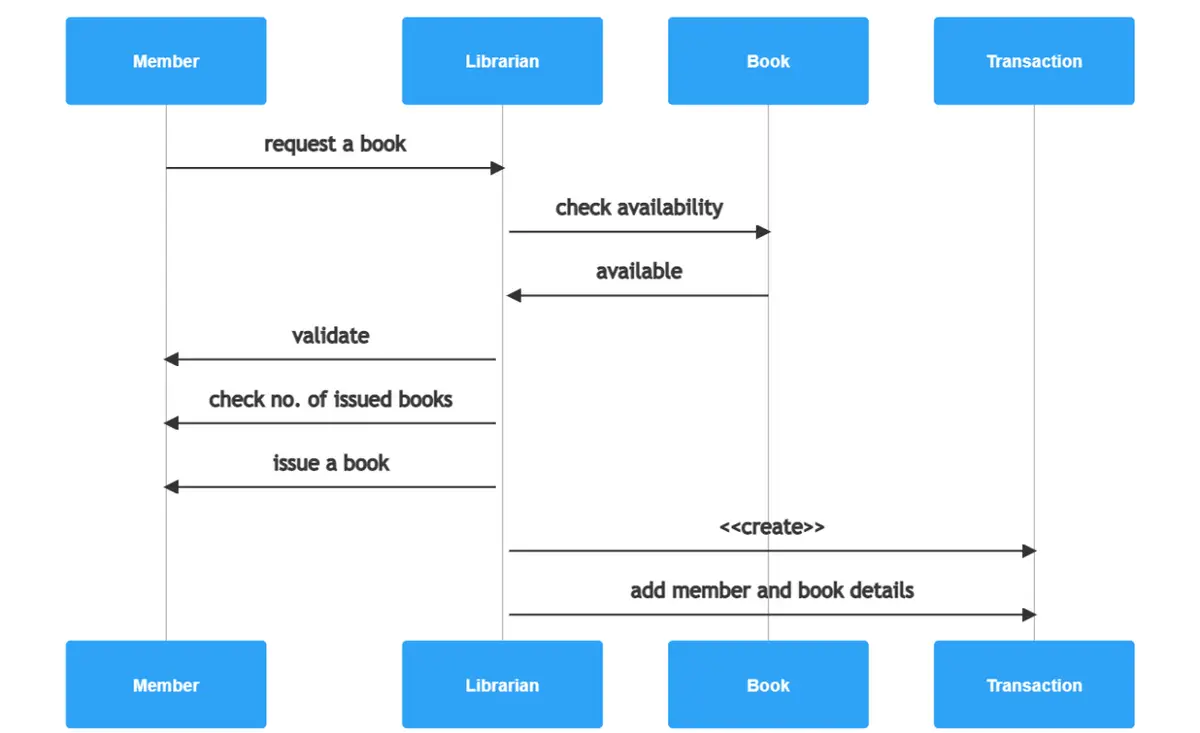
Our first interaction will be when a member of the library requests a book from a librarian.
In Gleek, we just need to write the following syntax in the code field:
Member-request a book->+ Librarian
Let’s quickly break that down. Member and Librarian are straightforward. Those are objects and Gleek will create rectangular boxes with vertical lifelines for them. The message is “request a book” and that syntax will create a labeled arrow in Gleek. Finally, the plus symbol at the end tells Gleek that an activity bar should be created on the Librarian lifeline because that object has been activated. But note that the activity bar won’t show up in our diagram until the end, until we tell Gleek that it should be terminated.
Here’s how it will look in Gleek.
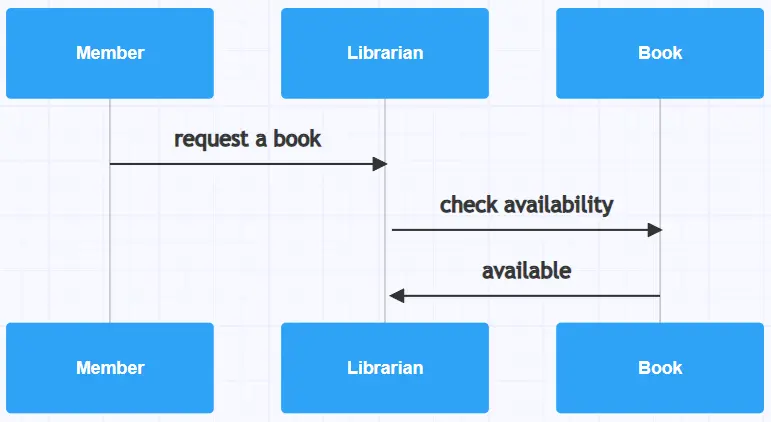
Next, the librarian will check the system to see if the book is available. This means an interaction with the Book object in the library management system. Again, we’ll use a labeled arrow and the Book object will automatically be created.
Librarian-check availability->Book

If the book is available, the Book object sends a message back to the Librarian object.
Book-available->Librarian
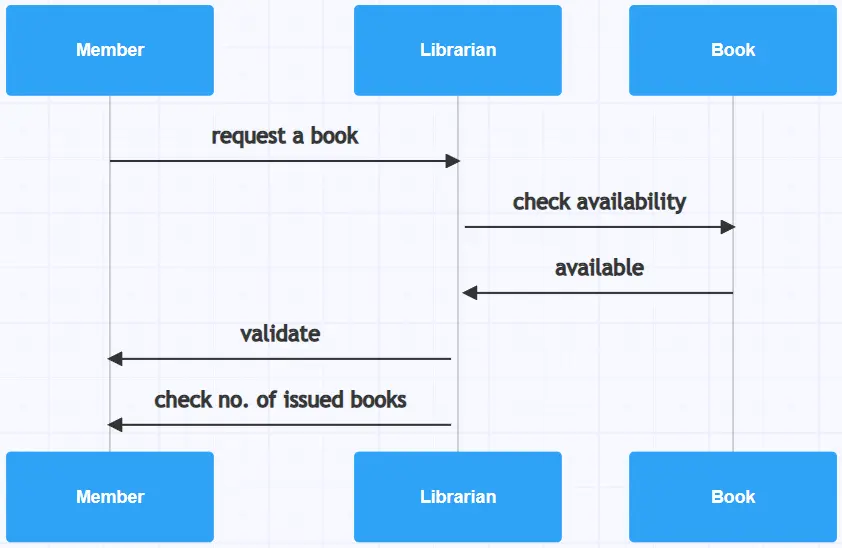
The librarian now needs to validate whether the member can borrow the book from the library. This is a two-step process of validating membership and also checking the number of books already issued.
Librarian-validate->Member
Librarian-check no. of issued books->Member
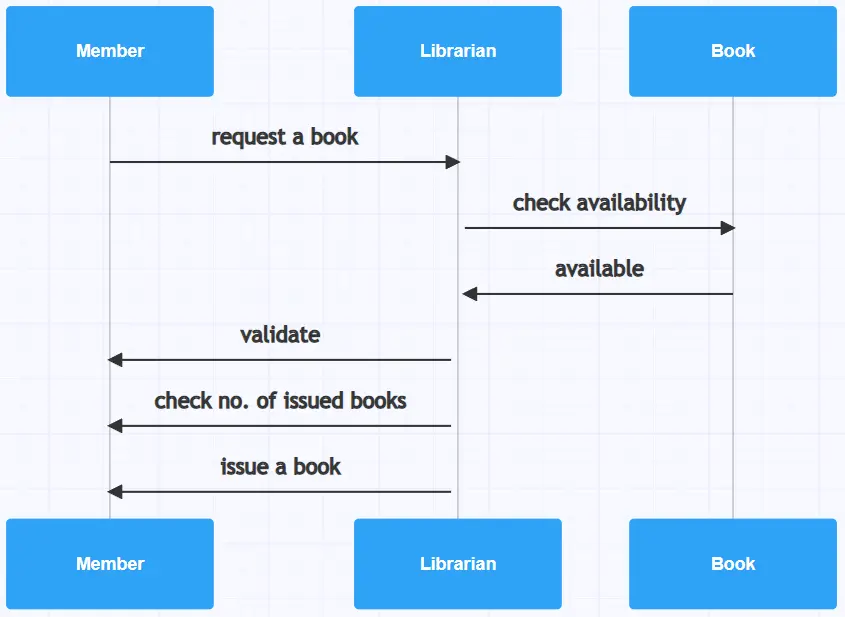
If the member is authorized to borrow the book, the librarian can now issue it.
Librarian-issue a book->Member
The librarian also needs to record the transaction in the library management system, and that brings us to our final object, Transaction. The Librarian sends a “create” message to Transaction. The message adds the member and book details to that transaction and it is stored in the database so that it can be used to check up on the member or book later on.
Librarian-<<create>>->Transaction
Librarian-add member and book details->Transaction
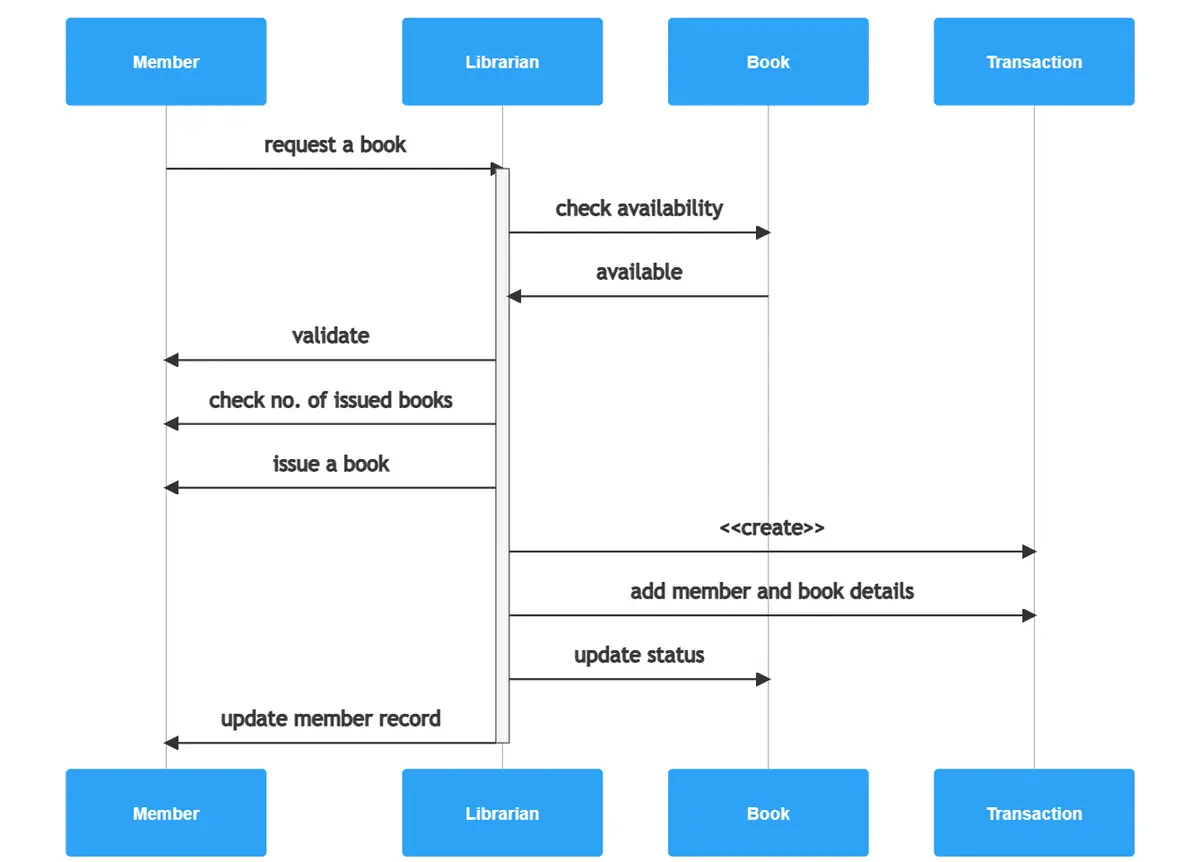
The librarian next needs to update the book’s status in the system, so it’s clear that it has been borrowed and isn’t available until returned. The librarian also needs to update the member’s record, to indicate that they have borrowed an additional book. That gives us the final lines in our simple library management sequence diagram.
Librarian-update status->Book
Librarian-update member record->-Member
Make your own UML sequence diagram with Gleek.
Note that there’s a minus symbol after the last message. That’s to tell Gleek to terminate the activation bar on the Library object. And that will also show us the activation bar in the finished diagram.
We hope you enjoyed learning how to create a sequence diagram in Gleek. If you want to try other examples, check out how to create a sequence diagram for online shopping system or how to create a user login sequence diagram.
Related posts
Sequence diagram for microservices with Gleek AI
Sequence diagram for ATM withdrawal: a step-by-step guide
How to create a user login sequence diagram
Top 8 UML sequence diagram tools