
What is a sequence diagram and what is it used for?
A sequence diagram is a type of UML (Unified Modelling Language) diagram that is used to model interactions between objects in a system over time. The sequence diagram lets a developer sketch out and demonstrates how processes will behave and interact in sequence.
Make your own UML sequence diagram with Gleek.
The diagram shows the objects, or actors, involved in the system. Each object has a lifeline that represents its existence in time. These lifelines are shown by parallel vertical lines that can never overlap. Each object can also have an activation bar on its lifeline that will show when it is active in the system and accepting or processing information from another object.
Activity in the system is shown by messages that pass between the objects. These messages are represented by a line with an arrow. Messages can be sent back and forth, from left to right, and the arrow shows which is the receiver and which the sender of the message. The arrows are usually labeled so that you can easily understand the content of the message.
That gives you an overview of what to expect from a sequence diagram. For much more detail, you should check out our sequence diagram page on Gleek.
How can you create a sequence diagram for a login system?
A great example of sequence diagrams is a user login system. Behind the scenes, any login page involves messages being sent back and forth, objects being activated, and responding with data, and it happens over a discrete period of time. That’s exactly what a sequence diagram is designed to show.
So what actually happens when you arrive on the login page for your favorite website?
Once the page has loaded, you’re usually presented with a form that allows you to enter your credentials, or in other words the information that you used to sign up for the site. This is often just your email address and a password. You enter your data and submit the form, and this is when the sequence diagram kicks in and shows how useful it can be.
Assuming you have filled in both the username/email address and password, the server will first check that the username exists in the system. The server will then run some complicated algorithms to check whether you have submitted the correct password. If everything is correct, you get cleared to enter the site. If not, you will usually get a response telling you to try again.
Check out our latest how-to article on a Sequence diagram for Microservices using Gleek AI chat.
From the point of view of the sequence diagram, the user is the first active object and sends credentials to the login page. This page in turn sends those credentials to the database that stores user information. The database responds and the user is either allowed to enter the site or not. In the sequence diagram, this is represented by an alt, or alternative, operator that creates a frame around part of the sequence showing the choice between accepting or rejecting the user login information.
Step-by-step guide to creating a login system sequence diagram
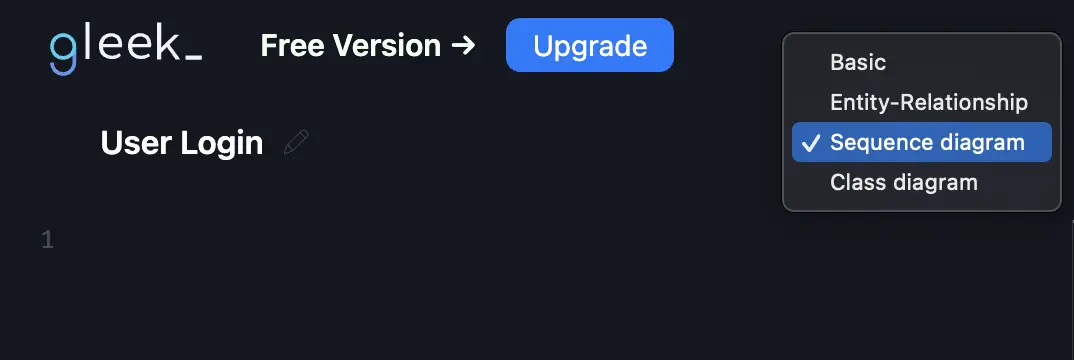
Right, let’s put our sequence diagrams to good use and model a login page for a website! First, we need to head over to the Gleek.io app and select “sequence diagram” from the dropdown menu.
Make your own UML sequence diagram with Gleek.
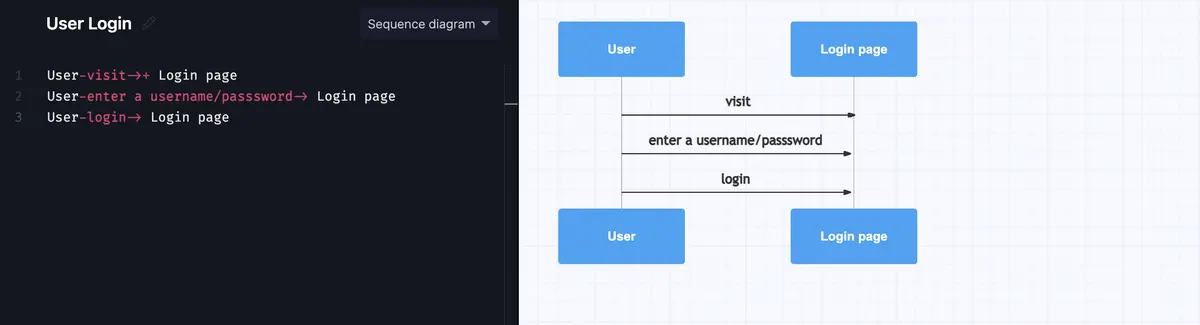
Then we need to create our user. That’s easy in Gleek. Just type the word “User” in the code field and Gleek will draw a rectangle with rounded edges to represent an object. Now the user needs to start interacting with the other objects in the system by visiting the “Login page”.
To show this interaction, just type a hyphen, then the word “visits”, and then another hyphen. Gleek can often predict what you want to type, so it will offer to complete the arrow. Go ahead and accept that and then hit the plus key. This will trigger the activation bar for the login page and show that this object is active.
User-visits->+ Login page

Now the user enters their username and password and hits the login button. These interactions are all messages to the login page. They’re also shown with labeled arrows. Note that you don’t need to use the plus symbol at the end of these arrows, as the “Login page” already has its activation bar.
User–enters username/passsword-> Login page
User-login-> Login page
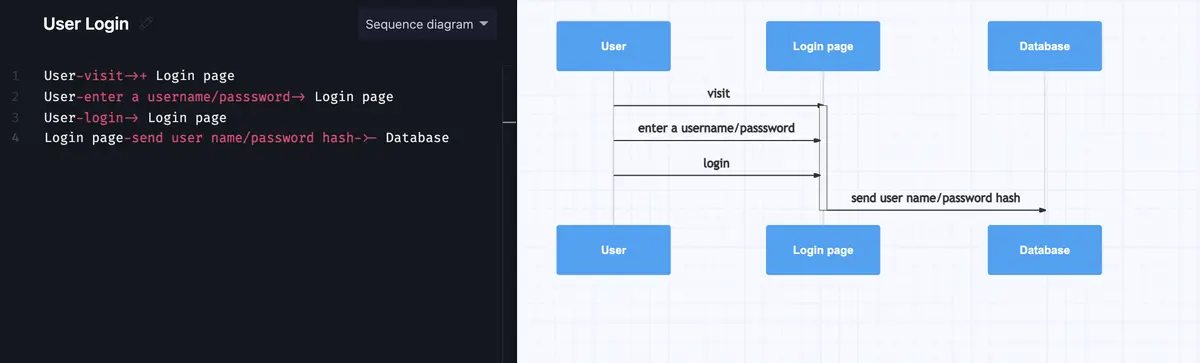
The action now shifts to the “Database”. The login page sends a message with the user login data to be checked. The big thing to remember here is to add a minus symbol to the arrow to remove the activation bar from the “Login page”. It can sit back and relax while the database does its job!
Login page–send user name/password hash->- Database
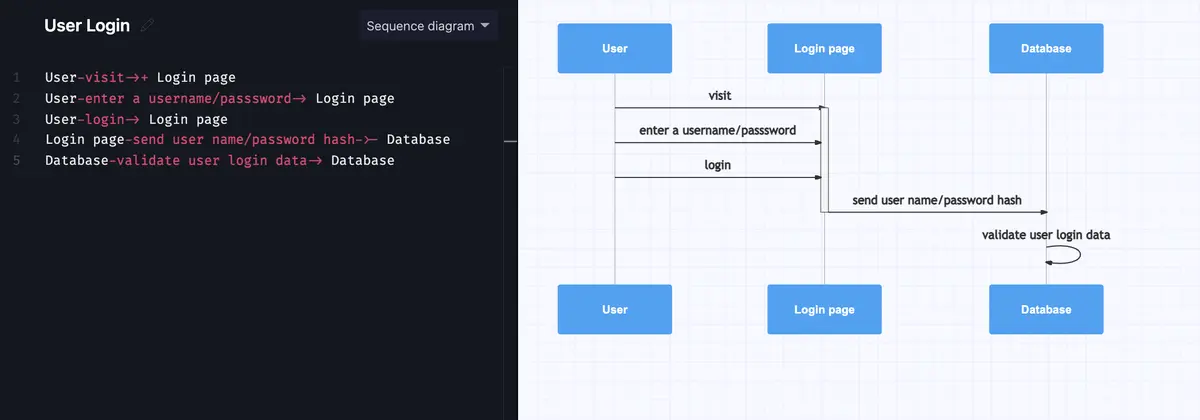
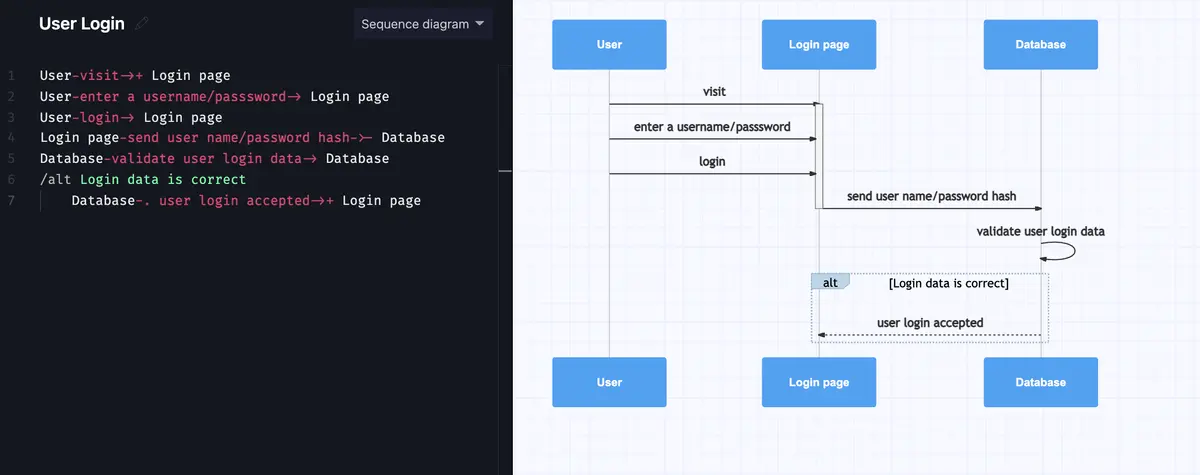
The database will create and receive a self-message as it validates the user login data. Because the message is going to and from the same object, Gleek will draw a nice looping arrow.
Database-validate user login data-> Database
Once the database has checked the username and password, the sequence diagram reaches a point where it has two possible paths to take. This is where we have to separate part of the diagram with an “alt”, or alternative, operator. This is easy to do in Gleek. Just type forward slash and alt. Gleek will frame this section with a tidy box. You can then describe this option, the alternate reality in which the “login data is correct”.
/alt Login data is correct
So the login data is correct, and the database sends a message that the user login has been accepted. This is a reply message, so it can be shown with a dashed line. You can do this in Gleek by typing a hyphen followed by a period. You then type the label and finish off the arrow. The login page will also need its activation bar triggered, so don’t forget that plus symbol.
Database-. user login accepted->+ Login page
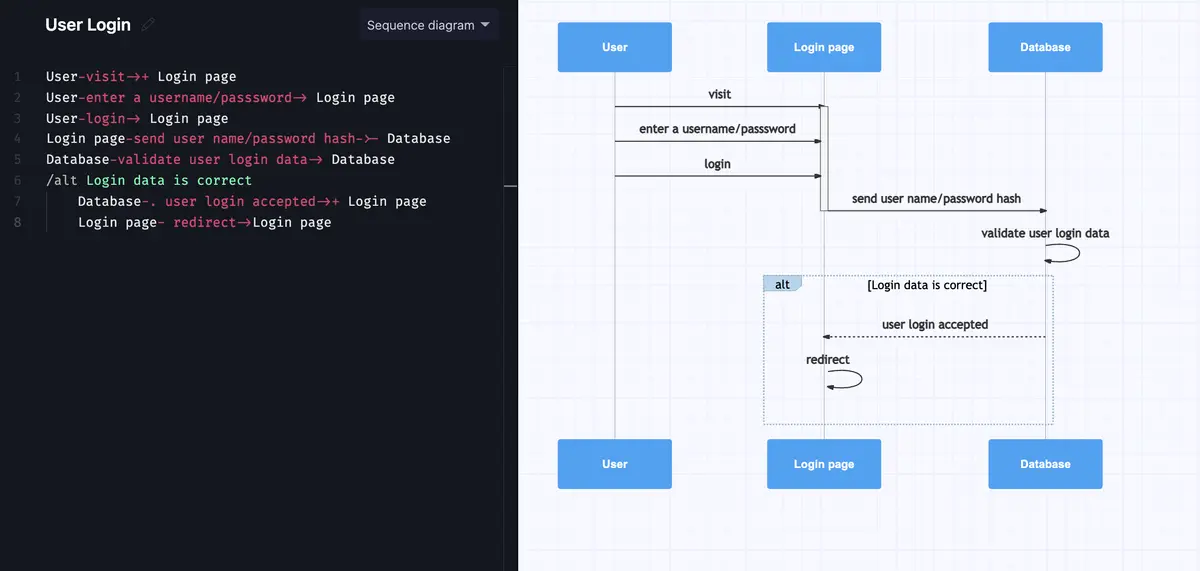
The login page will then send a self-message to instruct itself to send a reply message to the user that the login was successful.
Login page– redirect->Login page
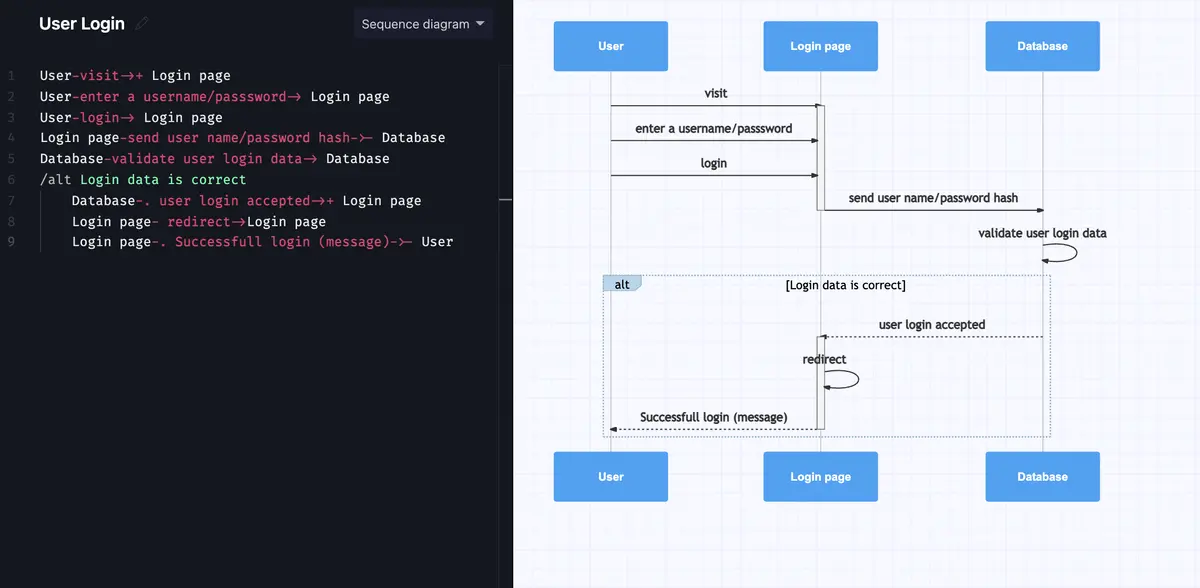
And the last step in this alternative path is that the message is sent to the user. Remember to end the activation bar with the minus symbol after this confirmation.
Login page-. Successful login (message)->- User
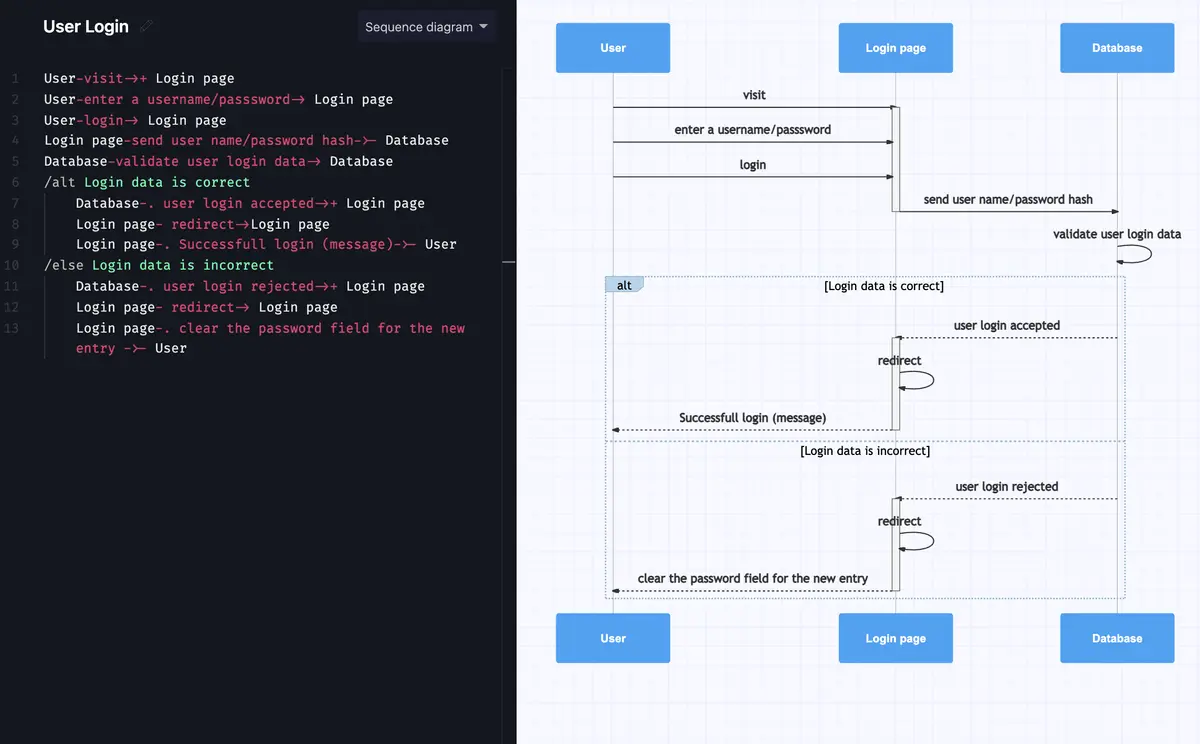
Now we have to deal with the bad alternate universe, where the login data was incorrect! For this, we’ll use an “else” operator. Again, start off by typing a forward slash and then just type else.
/else Login data is incorrect
The content and syntax for a failed login are similar to the successful login, but the resulting message sent to the user client is different. The final reply message sent to the user, in this case, is to clear the password field so that the user can try again.
Database-. user login rejected->+ Login page
Login page– redirect-> Login page
Login page-. clear the password field for the new entry ->- User
Make your own UML sequence diagram with Gleek.
It’s a sad result for our imaginary user, but hopefully, it’s helped you understand a bit more about sequence diagrams. If you liked this explanation, let us know here.
Related posts
Sequence diagram for microservices with Gleek AI
Sequence diagram for ATM withdrawal: a step-by-step guide
Sequence diagram for library management system
Streamlining APIs with Sequence Diagrams
System Sequence Diagrams vs. Sequence Diagrams in UML
Top 8 UML sequence diagram tools